Pulled Pork Butt

I decided to smoke two Pork Butts today to give away as “thank you” gifts. One was being made for the Schmidt’s, who had us over for a great Friday night and contributed to my post with the wonderful booze ideas. The other was for the neighbors who dropped off a cheese, potato, bacon and leek soup last night. They dropped off some excellent fish a few weeks ago. This was the least that we could do.

For those of you who have never cooked a pork butt, you are in for something special. Though it sounds like it may be from the back of the pig, the pork butt is the upper part of the front shoulder of the pig. It is a great blend of different types of pork and marbled with wonderful fat (known as flavor.) Most pork butts are between 7 and 10 pounds and sold with the bone in. You ideally want one that is also natural and not enhanced with a salt solution. Check your favorite butcher shop. I bought two that totalled to about 18 pounds.

20120205-213839.jpg

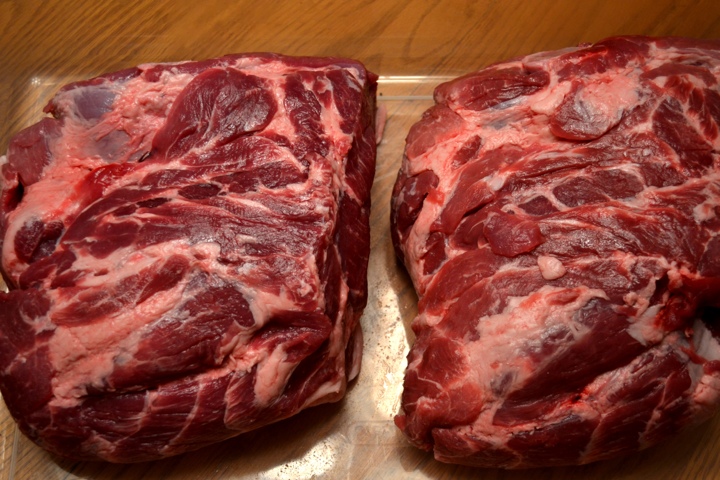
The first thing that you want to do is trim off any bloody spots, check for any bone fragments, and trim off most of the fat cap and large areas of fat. The internal structure of the butt has enough fat that the large amount of external fat is pretty much useless. Also, by trimming the fat, you have the opportunity for a larger amount of bark to form. Bark is the dark, flavorful crust that forms during cooking.

20120205-213554.jpg

Though the entire butt is delicious when it is done, the most delicious piece is referred to as the money muscle. It is referred to as the money muscle since many competitive BBQ teams use it as part of their winning strategy in competitions. Prior to cooking, it is pretty easy to find. First find the quarter sized oval bone that has been cut on one end of the butt.

20120205-214030.jpgOn the opposite side of the butt, you will see a horizontally stranded section of meat that is surrounded by fat. That is your ticket to pig heaven. I like to lightly trim around the money muscle so that I can more easily find it once the cooking is done.

20120205-214039.jpg

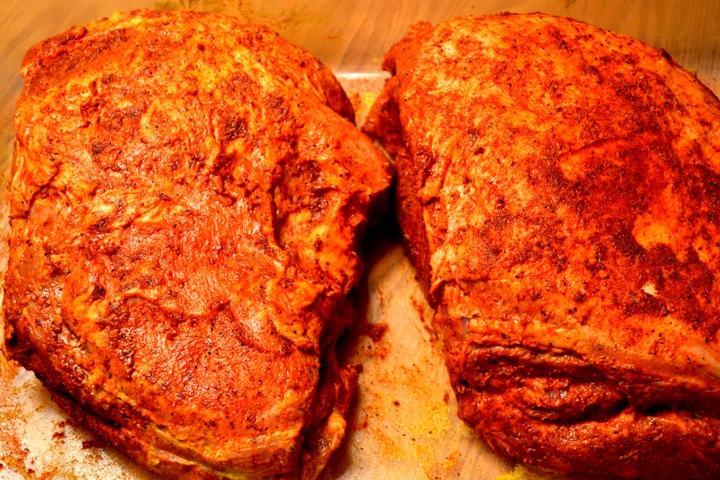
Once you have done your trimming, it is time to get some flavor added to the pork. The first thing that I do is cover the butts in yellow mustard. This is done to create a binding agent that helps the dry rub to the meat. Do not worry if you don’t like mustard, when you are done cooking, the mustard has been absorbed and you do not taste it at all. Rub it very liberally into every nook and cranny of the meat. My 5-year-old daughter is my super helper when it comes to this set of steps in the process. Since you will be working with raw meat, it is helpful to have someone else squirting the mustard onto the meat while you are rubbing it into the meat. Since this part of the process can get messy, I bought a large plastic storage tub that I use to work in. It is short enough to fit into my fridge but large enough to hold a couple of pork butts, a brisket, or a pile of ribs. Well worth the couple of bucks.

20120205-214100.jpg

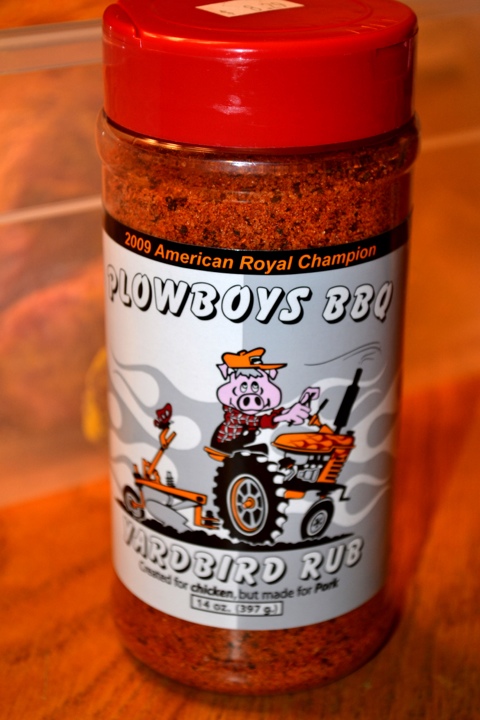
Once you have the meat coated with mustard, it is time to apply your dry rub to the meat. Once again, find your favorite helper and have them shake a large amount of rub onto the meat. Make sure that you work the flavor into all parts of the butt. I had been using Byron’s Butt Rub for my rub for the longest time. It is very good. Lately I have switched to Plow Boy’s Yardbird. It is a little sweeter than Butt Rub, and very good.

20120205-215326.jpg

20120205-214121.jpg

Once the rub is applied, I like to inject the butt to add some additional moisture and flavor. I have cooked a number of butt’s without injecting, and they turn out great. Since these were being given as gifts, I wanted to be sure that these were as tasty as they could be. The injection that I use is based on Chris Lily’s Six Time World Championship injection that he supposedly uses in the Big Bob Gibson’s restaraunts.

Pork injection

  • 3/4 cup apple juice
  • 1/2 cup water
  • 1/2 cup sugar
  • 1/4 cup salt
  • 2 tablespoons Worcestershire

To inject the pork butt, press the injector almost all the way through the meat and then press the plunger down while drawing the injector back up. I do this every inch or so on one side and then use the remaining injection around the sides of the meat, focusing on areas around the bone that I could not get to from above as well as ensuring the money muscle is fully injected.

20120205-214137.jpg

Once the butt is injected, I cover the pork butts and refrigerate them over night.

In the morning, I fire up the smoker and add some hardwood for smoke flavor. I really like the flavor that fruit woods add to pork. One of my favorites is apple or peach. I was out of fruit wood so I chose hickory for this cook. Hickory smoked pork, especially with bacon and ham, is very popular. I like to put the butts onto the smoker when it stabilizes at 250 degrees.

20120205-214158.jpg I like to keep the temps between 225 and 275 if possible. This results in about an hour per pound of cooking time. You want to cook the butt until it allows your thermometer to push through the meat like it is warm butter. That typically happens around 195 degrees. One other thing that you should know about large cuts of meat, they typically stall at a temperature for a long period of time while the internal fat breaks down. In some cases, the temp may even drop in the meat while this happens. In most cases, this stall happens around 160 degrees for me for pork butts.

Once the meat is probe tender, I wrap it in aluminum foil and tuck it into a cooler packed with old towels. It is best to let the meat rest for a minimum of an hour before pulling it. I like to rest it for about 3 hours. It will stay hot enough to serve for up to 6 hours kept in a cooler. When you finally unwrap the meat, be sure that you have something to catch the juices.

20120205-214218.jpgI like to leave the pork in large chucks but it is up to you on how fine you shred your pork. Enjoy!

20120205-214229.jpg

Here is a shot of a pulled pork sandwich with slaw and Blues Hog BBQ sauce.

20120205-214239.jpg

Posted in BBQ, Pork | Leave a comment

Schmidt’s Booze Recipes/Ideas

We stopped over at a co-worker’s house last night for one drink. We left about 5 hours later and with a few new recipes/ideas for coping with life. I will get pictures up when we make these, but I did not want to lose these.

20120204-085324.jpg
Nassau Royale
There is no real recipe here. It is a rum that the ran into in the Bahamas and it is a great sipping rum over ice. We will be grabbing some of this soon. Great stuff.
20120204-083746.jpg
Stoli Doli
This stuff is dangerous. But very good. Vodka infused with pineapple served on the rocks.

Step 1 is to get a 1.75 ltr of Stolichnaya Vodka.

Next you take 2 fresh ripe pineapples, core them and cut them up. Layer the pieces of pineapple into a jar and pour the Stoli over the top. Let this sit for 2 weeks. After 2 weeks, strain the liquid through a fine strainer with a coffee filter inside of it.

Serve this on the rocks. Wow.

Jellyfish
In a double shot glass (a tall shot glass works best), add the following in this order, each taking up just less than 1/3 of the glass:

  • white creme de cacao
  • amaretto
  • Bailey’s Irish Cream

Once those are layered in the shot glass, drop 4 drops of Grenadine into the shot causing the Jellyfish effect. A chocolate covered cherry shot.

Posted in Drinks | Leave a comment

Trinrud’s Artichoke Dip

Fantastic artichoke recipe that my wife got from a co-worker a number of years back.

1 can artichoke hearts (packed in water) drain and roughly chop
1 cup fresh grated parmesan cheese
1 cup mayo
1 cup cream cheese (room temp)
1 cup sour cream (can use light but why bother)
dash garlic powder

Blend together the mayo, cream cheese, and sour cream. Stir in rest of ingredients.
Bake in low oven (325) for 1/2 hour until bubbly. Transfer to crockpot and cover with colby jack cheese.

Serve with wheat thins and celery.

Posted in Appetizer | Leave a comment

Seven Layer Salad Dressing

As a side dish to the Hot, Hot, Hot Dog party, I made a classic seven layer salad. I chopped up a head of romaine, sliced some grape tomatoes, thawed some frozen peas, added sharp shredded cheese, hard boiled egg, some sunflower kernels and some croutons. What set this salad apart was the homemade dressing. I mashed together a few ideas from online and came up with the following. In order to make the cleanup simpler, add all of the following to a blender, blend until smooth and then chill to serve.

Makes 4 cups

1 cup low-fat sour cream
1 cup low-fat mayonnaise
2 cups low-fat buttermilk
2 cloves garlic
2 tablespoon sugar
1 teaspoon dry mustard powder
1/2 teaspoon sweet paprika
salt and pepper to taste

Enjoy!

Posted in Salad | Leave a comment

Hot Hot Hot Dog Chili

My eight year old’s birthday was yesterday, and if you knew him, you would know his affinity for “Hot Hot Hot Dogs.” When we were planning his birthday party and asked him what he would like to eat, you can guess what he wanted. Hot dogs, most people would roll their eyes at serving hot dogs for a family event, especially in January in Wisconsin. I decided to kick it up a notch and create a bit of a hot dog bar that included a homemade chili for the dogs. It was inspired from a few different online sources. It turned out really good. Here you go:

  • 3 lb of ground beef
  • 4 onions diced
  • 6 cloves of garlic chopped
  • 10 Tbsp chili powder
  • 3 Tbsp cumin
  • 3 six ounce cans of tomato paste
  • 3 Tbsp yellow mustard
  • 3 Tbsp of Worcestershire sauce
  • 2 Tbsp of brown sugar
  • 3 cups water
  • salt and pepper to taste (this needed quite a bit of salt to round the flavor out)

Cooked the beef and onions in a large skillet until the meat was no longer pink. Drain the fat. Add the chili powder and cumin and cook for 3 minutes. Add the water, tomato paste, brown sugar, mustard and Worsty sauce and bring to a boil. Boil for 1 minute and then pour in crock pot to continue to heat. Serve over natural casing all beef dogs on a soft bakery bun. Top with shredded sharp cheddar and nuke for 30 seconds to melt the cheese.

20120122-135206.jpg

Posted in Other | Leave a comment

Fruit of the Loin

A half price sale on a pork loin, the King Pig UDS, some applewood smoke and the NFL Playoffs.  Calling today a good day would be an understatement.

20120114-184501.jpg

Since the full loin was over 9 lbs, I decided to break it down into some 1.5″ thick boneless chops for later this week, and a 5 lb chunk that would go on the smoker.  As a part of this day of smoke, I am making a Brunswick stew for tomorrow’s Packer game against the Giants.  Part of this smoked loin will end up in there and part will be used for sandwiches to be enjoyed during today’s playoff games.

20120114-184550.jpg

The loin that was headed to the smoker was first rubbed down with some yellow mustard.  For those of you who are not familiar with BBQ’ing, mustard is used quite often as a binding agent for dry rub on meat.  Don’t worry, you won’t taste it after the meat has been cooked.  Be sure to wear food safe gloves when working with mustard if you are bothered by jaundice-looking hands.

20120114-184601.jpg

Once the mustard was rubbed on, the dry rub was liberally shaken on by my 5 year old sous chef.  For this cook I decided to try the Plowboys BBQ Bovine Bold rub.  I really like their Yardbird rub on Pork Butt’s, so I figured I would give this a try.  It turned out to be another great rub.

The King Pig Ugly Drum Smoker (UDS) was fired up with some Royal Oak Lump charcoal and a couple of chunks of apple wood.   It was a 19 degree day with calm winds.  Notice the snow that we finally got this winter.

The UDS was brought up to 275 degrees and the loin was put on.  Based on what  I had read, most people cook the loin between 250 and 275 degrees for around 30 minutes per pound.  I planned to cook the pork to about 140 degrees and let it come up to 145 degree safe point by resting it in aluminum foil.

Once the loin hit 140 degrees, it was pulled off the smoker and foil wrapped.  I put it in the oven (which was turned off) for about an hour to rest.  I poured a small amount of apple juice into the foil for some moisture.  As you can see, the loin stayed very moist.  The foil was full of juices and this was one of the most moist pieces of pork we have had.

A nice thick cut of the pork loin with some Sweet Baby Ray’s on a Manderfield’s (local bakery) bun and you have a meal fit for a queen (and I thought it was great too.)  Based on how fast this cooked (2.5 hours), how great it tasted, and how healthy this cut of meat is, this will be definitely something that I do again.

Posted in BBQ, Pork | Leave a comment

Pulled Pork Egg Rolls

This past Thanksgiving we did something a little non-traditional, we had an appetizer party. The Green Bay Packers were playing Detroit and we had a large group over to watch the game. Everyone was asked to bring an appetizer or two, and the rule was that it could not have been something that you had made before. It gave us a chance to try a bunch of new recipes and not having traditional Thanksgiving meal items was a nice break for the folks who were going to multiple family gatherings that day.

One of the recipes that turned into a big hit that day was Pulled Pork Egg Rolls. These were inspired by a post on The Smoke Ring by Brutalgrandpa. I have decided to make these again for a Packer party that we are having tomorrow. The dipping sauce and the cole slaw taste best when made the day ahead. In addition, I thawed a quart bag of left over pulled pork from our Christmas porkilicious cookout.

Coleslaw

The slaw is basic and a little drier than many, but it works great for wrapping into egg rolls.

Ingredients

  • 1/3 cup mayonnaise
  • 2 tablespoons apple cider vinegar
  • 1 tablespoon sugar
  • 1 teaspoon celery salt
  • 1/2 teaspoon garlic salt
  • 1 teaspoon freshly ground black pepper
  • 1 bag pre-shredded coleslaw mix 1/2 red onion, sliced to match thickness of bagged slaw mix

Mix all of the ingredients together in a non-reactive bowl and refrigerate overnight.

Peach Dipping Sauce

Ingredients

  • 3/4 cup peach preserves
  • 3 tablespoons rice wine vinegar
  • 2 tablespoons Dijon mustard
  • 1 tablespoon grated ginger
  • 1 teaspoon red pepper flakes

Mix until incorporated and refrigerate overnight.

The Egg Rolls

For those of you who have not made egg rolls before, the key is to wrap the rolls correctly. First, place the wrapper in front of you with one of the corners pointed up (like a diamond). Next, place the filling in the middle of the wrapper.

To start the rolling, the sides are folded back towards the middle of the wrapper.

Next you roll from the bottom up towards the top. You want to keep the egg roll very tight at this point as well as watch to ensure that the ends stay tucked tight. The end flap is rubbed with some egg wash to keep the egg roll sealed.

I made 15 of these for the game today. Notice the little one in the front right corner. I ended up with only half of a wrapper in the package. It must have been a Friday afternoon at the egg roll wrapper quality assurance station.

The egg rolls were then put in the fryer until browned.

These turned out great! Much better than the Packer game that they were eaten during.

20120122-143601.jpg

Posted in BBQ, Pork, Side Dishes | Leave a comment

Brunswick Stew

There are as many different recipes for Brunswick stew as there are opinions on where the stew was originally created. Brunswick stew is said to have originated in either Brunswick, Georgia, Brunswick, Virgina, or Brunswick, South Carolina. Each area of the country has their take on this leftover BBQ stew. I spent some time online and combined a few different recipes into my Wisconsin version of this southern comfort food.

The heart of the Brunswick stew is the smoked meat. Most recipes call for a combination of smoked chicken and pork. I had some rib tips in the freezer from the Deer Hunting cook a few months ago, a package of chicken drumsticks, and I was cooking a pork loin today that I figured I could incorporate into this stew as well.

I rubbed the rib tips with Simply Delicious Sweet and Spicy and the Chicken with Simply Delicious Cherry Rub.

Both of these were cooked with the Pork Loin on the UDS for about 2.5 hours at 250 degrees.

Here are the ingredients that I have decided to try for my Brunswick stew:

Ingredients:

  • 2 lb – 3 lb smoked meat
  • 2 TBSP of your favorite rub (I used Simply Marvelous Sweet and Spicy)
  • 2 28oz cans whole tomatoes, including the juice
  • 2 11oz cans shoepeg corn
  • 1 1/4 cup ketchup
  • 1/4 cup cider vinegar
  • 1/2 cup your favorite BBQ sauce (I used Blue’s Hog today)
  • 2 cups water
  • 1 tsp black pepper
  • 2 tsp salt
  • 1/2 to 1 tsp cayenne
  • 1 tsp hot sauce
  • 1 stick butter
  • 2 cans of butter beans with the juice
  • 4 or 5 potatoes diced

Pulled the meat off the bone and then mixed the BBQ Rub into the meat.

Cut the whole tomatoes into chunks and add the juice to the crock pot.

Add all of the other ingredients except for the butter and the potatoes.

Cooked the stew on high for 4 hours in the crock pot. The plan is to add the diced tomatoes and butter tomorrow morning and cook on high until the potatoes are cooked through.

20120122-143438.jpg

Posted in BBQ, Chicken, Pork | Leave a comment

Grilled Pizza

20120112-185011.jpg

The family, and I of course, love pizza on the grill. This love came about as almost an accidental side thought. In the summer of 2010, the family decided to do an Italian themed summer cookout. The main dishes were lasagna and chicken fettucine alfredo. Being the experimenter that I am, I decided to make grilled pizza for appetizers and tiramisu as a desert. We were not crazy about the dessert, but the pizza has moved to the main attraction for many get togethers in the past 18 months.

Pizza Crust

Making your own pizza crust from scratch may sound like a lot of work, but it really isn’t. The difference in the quality of the pizza is night and day. We tried to use a store-bought fresh dough when we were in a pinch once, and it was no where close. We have also frozen this and had good luck. By far, the best is fresh!

Ingredients:
• 4 cups all-purpose flour
• 1 1/2 cup warm water (about 110 degrees)
• 2/3 cup whole-wheat flour
• 1 tablespoon olive oil
• 1 package active dry yeast
• 1 1/2 teaspoons salt
• 1 teaspoon sugar

Preparation:
Combine water, oil, yeast and sugar in a small bowl. Let stand 5 minutes or until it bubbles. Mix flours and salt together thoroughly in a food processor or mixer. Add water mixture while blending. Let mix for 2 minutes. Knead briefly on a lightly floured surface. Place in a large oiled bowl and let stand in a warm place for 2-3 hours. It should double in size. Once the dough has raised, lightly flour two cooking sheets. On a floured surface roll out 1/4 of the dough into a circle about 1/8 inch thick. Place on cooking sheet. Spray the top of the pizza crust with a good olive oil and top it with aluminum foil. Repeat with additional crusts and make a stack.

There’s no better way to cook a pizza than on the grill. The high, dry heat of your grill makes it the perfect pizza oven. I typically spray the bottom of the crust, coat it with a little corn meal and throw it on the grill until it bubbles. I then pull it off, spray the uncooked side with olive oil, and flip it over. The cooked side will be the top of the pizza. Spread your favorite sauce, cheese and toppings on the pizza and throw it back on the grill until the cheese melts.

The crust should come off the grill looking like this:

One Side Grilled

Half way there

Time to Top It

Traditionally you probably think of sauce and sausage or pepperoni on your pizza. The first time that I made this, for the appetizers, I was trying to keep this lighter so I chose a sauceless pizza. Not only did it work, it is the most requested pizza that I make. The secret is in the balsamic sauce. Use it as a drizzle right before you serve each piece and you will have transported your guests to an artisinal wood fired pizza joint. The quality of the balsamic does matter. I use a local 18 yr old balsamic that is close to fruit juice in taste. A medium cost grocery store bottle should do the trick as well.

Sausage and Pepper Pizza

    • 1 pound sweet or hot Italian sausages
    • 1 red bell pepper, seeded and cut in half
    • 1 yellow bell pepper, seeded and cut in half
    • 4 roma tomatoes, thinly sliced
    • 2 cups grated mozzarella cheese
    • 3/4 cup olive oil
    • 1/2 cup grated Parmesan
    • 1/2 cup balsamic vinegar
    • 4 cloves garlic minced
    • 2 tablespoons fresh rosemary, chopped
    • Pizza Dough from above

Preparation:
Preheat grill. Divide pizza dough into 4 equal pieces. Roll into rounds about 8 to 9 inches in diameter. Combine olive oil, balsamic vinegar, garlic and rosemary. Brush bell peppers lightly with mixture. Place sausage and bell peppers on hot grill. Grill until peppers have started to blacken and blister and sausage is sizzling and browned. Remove from grill and cut the peppers into thin strips and the sausage into thin slices. Place pizza rounds on hot grill. Allow to slight brown on both sides. Remove from grill and top with cheeses, sausage and bell peppers. Light drizzle olive oil mixture over the top and return to the grill over a low heat. Close lid and grill until cheese is melted. Remove and serve.

Back on the Grill

Back on to finish

Posted in Pizza | Leave a comment

Deer Hunting Beans and Cheesy Potatoes

Deer hunting 2011 was a pretty laid back affair.  Due to the crazy fall of 2011 and the lack of deer, I became the camp cook.  We had a fatty for breakfast sandwiches, ABT’s as a snack before the Friday night fish, ribs and chicken for Saturday night, and a great first crack at some beans and some potatoes.  Both turned out great, and even though our lone hunter “Big Boss Man” never saw any deer, it was worth keeping these two recipes.  I wish I had taken a few pictures.  The next time I make these I will be sure to snap a few….

Hunting Beans (inspired by Wicked Beans)

  • 6-8 Strips of Bacon cut into small chunks
  • 1/2 of a medium onion diced
  • 1/2 of a bell pepper diced
  • 1-2 Jalapeno peppers diced
  • 1 55oz can of baked beans
  • 1 8oz can of pineapple chuncks drained
  • 1 cup of Brown Sugar
  • 1 cup of Ketchup
  • 1 Tbsp of dry mustard

Saute the bacon, onion, and peppers until they are tender and the bacon is crispy.  Combine all other ingredients with these into a disposable baking pan and cook on the smoker at around 250 degrees for 2 hours.  I cooked these underneath a fatty and the drippings were great in the pan.  Cooking these under ribs would be great as well.

Cheesy Potatoes

  • 2 lbs of diced potatoes (have had trouble with precooked potatoes from the store not getting soft, maybe precook them before using)
  • 1 large can of cream of mushroom soup
  • 8 0z of sour cream
  • a diced medium onion
  • a diced green pepper
  • 1 stick of butter
  • 1 pkg of cream cheese
  • 2 pkgs of shredded cheese
  • 2 Tblsp of a combo of salt, pepper,onion and garlic powder (SPOG)
  • a few shakes of your favorite BBQ rub

Grease a 9×12 pan and pour potatoes into it.  In a pot, melt butter and then add soup.  Stir to incorporate.  Add sour cream and stir to incorporate.  Add cream cheese and stir to incorporate.  Add 1 pkg of shredded cheese and stir to incorporate.  Mix in SPOG spices.  Pour over the potatoes.  Cover with foil and cook at 350 degrees for one hour.  Uncover the pan, sprinkle with the other pkg of cheese, and broil for 5-10 minutes to melt and brown the cheese.  Sprinkle the BBQ rub over the dish and serve.

Posted in BBQ, Side Dishes | Leave a comment